Closed Loop Vs Open Loop Graphics Cards Water Cooled
There are two types of water cooled graphics cards (and CPU coolers) that you can get. The first is closed Loop. In simple terms this is a graphics card that comes with a water cooler pre-attached that you can not open and do not need to fill with any kind of liquid. On the other hand we have Open Loop which require a pump, reservoir, radiator and tubing in addition to all the cooling blocks for your components. You then have to use some kind of coolant to cool your PC.
Both these methods have some positive and negatives especially when it comes to graphics cards. In this guide we will discuss the positives and negatives of each in the closed loop vs open loop graphics cards.
Table of Contents
Check more water cooling articles
Pre Built Watercooled GPUs Or Self Build
It’s important to know that some graphics card manufacturers have both the fan version as well as the water cooled versions that you can buy without any hassle. They have these in both open and closed versions so we will take a look at it below.
Closed Loop
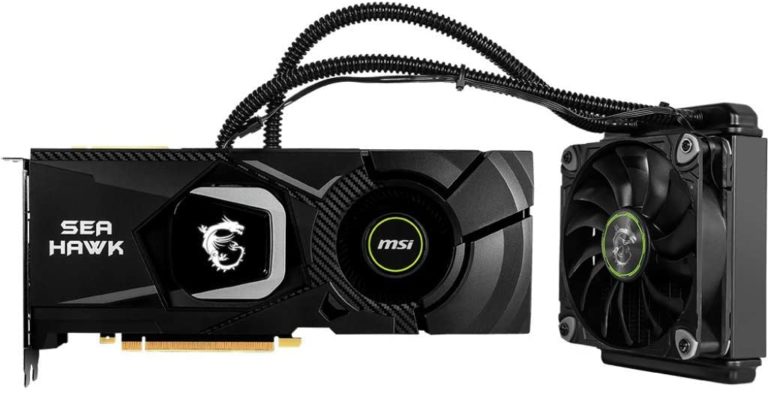
These closed loop pre made graphics cards are fairly uncommon but do exist. They usually have a closed water cooler cooling the GPU and a fan cooling any other components. There are versions with just the water cooler and no fan on the graphics card but these are more rare. This is an example of a pre made closed loop water cooled graphics card.
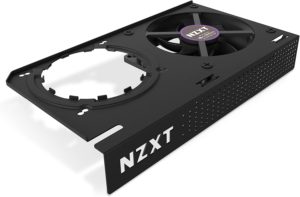
The other way to get a closed loop graphics card is to build it yourself with a classic CPU water cooler and an adaptor. The adaptor features a fan and a hole where the GPU lies. Your CPU cooler then fits in the hole and water cools your GPU. This means you can cool virtually any graphics card and it would not matter about the manufacturer’s design. Although this makes for good cooling, it can take up a lot of space from the radiator and cooler.
Open Loop
There are also two versions of open loop graphics cards you can get. One by attaching your own cooler and the other is attached by the manufacturers.
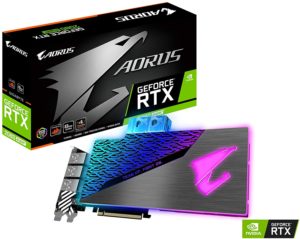
Below is an example of a water cooled graphics card by gigabyte which has a pre attached water cooler design for people with open loop setups. These pre attached open loop coolers are great as you can have rgb lighting and lots of customization. The fact that the cooler is already attached means that the big hassle of attaching a cooling block is gone.
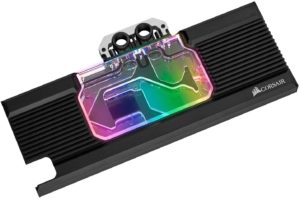
As you’ve probably guessed the other version is where you can attach the water block yourself. You can get the cooler which requires the water to go in and out using tubing. You have to take off your old fan and heatsink to be able to attach the cooling block. This way is more difficult as it takes time to remove and attach the block.
Usability and Customization
Closed Loop
Closed loop graphics cards are a lot easier to use. You just take them out of the box, plug it in and attach your cooler to your case. It is very easy to use and prevents the majority of leaks. Even the option of using a CPU cooler with the adaptor is still very simple to set up.
The major down fall is customization and space. If you want to water cool both your graphics card and your cpu then you’re going to need to use two radiators which will take up a lot of space. If you have more than one graphics card then the space that all the cooler need aren’t going to fit. This is due to the fact that you can only cool one component with a single water cooler.
You will also lack customization apart from the block that you have. The tubing and liquid will be what the manufacturers use.
Open Loop
Whilst a lot harder to setup. The open loop cards allow all your components to be cooled with one water cooling setup. You can use any tubes and coolant you like.
Open Loop graphics cards are not exactly plug in and play but they allow great customization.
Leaks and cooling problems are a lot more common in open loop setups as you are directly dealing with the coolant and connections. If you’re setup isn’t correct then you can actually sometimes see worse temperature readings or even worse gpu failure.
Leaks are not ideal and do happen in open loop setups. They happen in closed loop as well but nowhere near as much. If you have a leak it can severally damage your components and cause a real mess depending on what type of coolant your using.
Requirements
Closed Loop
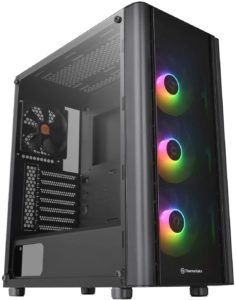
The main requirement for closed loop is to ensure that the radiator cooler can fit in your PC case. You will also need a good amount of space for your graphics card which may be slightly bigger in width. Closed loops generally require a lot less space than open loop setups so you can go for a fairly small mid tower atx case with 360mm and 240mm openings like the Thermaltake V250 which can fit 360mm radiators and 240mm ones either at the front or on top.
Open Loop
For open loop you need more space for the radiator and reservoir. Most big newer cases will be able to fit a radiator of 360mm (like the Thermaltake V250) but not all will fit the 480mm raditor which requires quite a bit of space.
You will need some space for a reservoir and pump. Some reservoirs and pumps come together and thus save space. You can get them in tube designs and cube designs so its important you choose one that fits the space you have in your case.
Tubing is required for open loop. Here you can easily customize your build using colored tubing or colored coolant and you can also decide if you’re going to use hard tubing of soft tubing. If you’re using hard tubing you will need a way of measuring and bending the tubing to fit your build.
Costs
Closed Loop
Generally a lot cheaper. You don’t need to buy all the tubing and accessories that open loop requires. A good pre built water cooled GPU may only cost slightly more than the fan version
Open Loop
Costs more but you can get pre built ones with the cooler attached and will only cost a bit more than the fan version. You will still need a full water cooling setup though.
Equipment Needed
Closed Loop
All you really need is a Philips screwdriver and some cable ties to tidy up any loose tubing or cables.
Open Loop
You will need a lot more including zip ties, screw driver set, and tools like a heat gun and gloves to be able to bend hard tubing. If you’re taking off your graphics card heatsink then you will also need some pliers and flat tools to remove the heatsink safely.
Conclusion
We have seen the differnet types of water cooled graphics cards and the positives and negatives of each. Whilst there is no clear winner, you will need to choose based on what is best for you. If you have the space and more cash and looking for good thermal performance then we recommend getting an open loop water cooling system. We would also recommend that you get the manufacturer built graphics cards with the water cooling block rather than attaching your own. It saves a lot of hassle and you are less likely to damage your graphics card. Be sure to check our other guides here.
